这篇笔记中我们用菲涅尔边缘光的效果来熟悉一下最基本的 Shader 操作。
NdotV
计算光照时,我们假设我们有一个顶点的法线信息(N)。同时,我们也有观测方向的单位向量 ViewDir(V)。
考虑一下这两个向量点乘的结果:
如果 N · V 的结果接近 0,说明这两个向量近似于垂直。什么样的情况下会观测方向会和法线几乎垂直呢?显然是当这个顶点处于观测的边缘的时候。
如果 N · V 的结果越接近 1,说明这两个向量越近似于平行,显然,是在可以观测到的范围内,处于视线能看到的地方。
因此,我们需要的就是顶点的法线。
struct appdata
{
    float4 vertex : POSITION;
    float2 uv : TEXCOORD0;
    float3 normal : NORMAL;
};
顶点着色器
首先,我们先考虑一下片元着色器需要顶点着色器提供哪些信息。
裁剪空间的坐标:pos : SV_POSITION
物体自身的 UV 坐标: uv : TEXCOORD0
世界空间下的法线:normal_world : TEXCOORD1
世界空间下的观测方向: view_world: TEXCOORD2
struct v2f
{
	float4 pos : SV_POSITION;
	float2 uv : TEXCOORD0;
	float3 normal_world : TEXCOORD1;
	float3 view_world: TEXCOORD2;
};
在顶点着色器中,除了要将模型空间的坐标(vertex : POSITION)变换到裁剪空间下(这里我们就直接使用 UnityObjectToClipPos() 函数了,事实上,如果你使用 mul 和之前的变换矩阵,会被 Unity 自动替换成这个),我们还需要将法线从模型坐标转换到世界坐标。
v2f vert(appdata v)
{
	v2f o;
	o.pos = UnityObjectToClipPos(v.vertex);
	o.normal_world = normalize(mul(float4(v.normal, 0.0), unity_WorldToObject).xyz);
	o.uv = v.uv * _MainTex_ST.xy + _MainTex_ST.zw;
	return o;
}
We also need the view direction vector.
v2f vert(appdata v)
{
	v2f o;
	o.pos = UnityObjectToClipPos(v.vertex);
	o.normal_world = normalize(mul(float4(v.normal, 0.0), unity_WorldToObject).xyz);
	float3 pos_world = mul(unity_ObjectToWorld, v.vertex);
     //_WorldSpaceCameraPos comes from the header UnityCG.cginc
     o.view_world = normalize(_WorldSpaceCameraPos.xyz - pos_world);
	o.uv = v.uv * _MainTex_ST.xy + _MainTex_ST.zw;
	return o;
}
Finally in the fragment shader, we compute the NdotV part, which is the dot product of the normal and the view direction.
float4 frag(v2f i) : SV_Target
{
float3 normal_world = normalize(i.normal_world);
float3 view_world = normalize(i.view_world);
float NdotV = dot(normal_world, view_world);
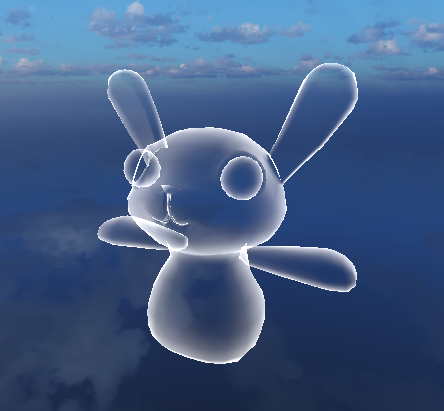
return NdotV.xxxx;
}We know that for dot product of 2 normalized vectors, the dot product should fall between (-1,1), so it make sense to saturate() the result of the NdotV. The rim light should just be the difference between 1 and saturate(NdotV);
float4 frag(v2f i) : SV_Target
{
float3 normal_world = normalize(i.normal_world);
float3 view_world = normalize(i.view_world);
float NdotV = dot(normal_world, view_world);
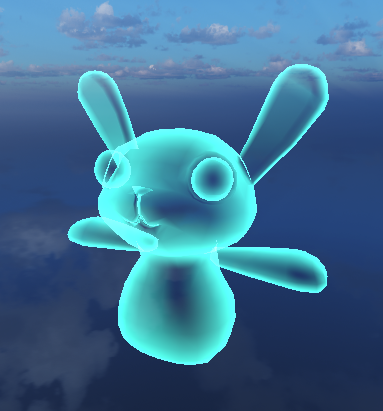
float rim = 1.0 - saturate(NdotV);
return rim.xxxx;
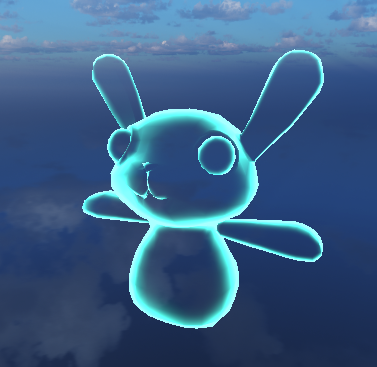
}Using the Blend Mode Blend SrcAlpha One, we will have a very nice rim light effect.
One more thing, if we want to adjust the color of our rim light, we can just use the rim as the alpha value and use a color property to determine the final finish.
float4 frag(v2f i) : SV_Target
{
	float3 normal_world = normalize(i.normal_world);
	float3 view_world = normalize(i.view_world);
	// _Color is a float4 property and _Emiss is a float property
	float3 color = _Color.xyz * _Emiss;
	float NdotV = dot(normal_world, view_world);
	float rim = saturate((1.0 - saturate(NdotV)) * _Emiss);
	return float4(color, rim);
}
Adjust the Rim Light Falloff
Using pow() to adjust value falloff is a frequently used technique in shader codes. If we want to add control to our falloff, we can just add another property.
Properties
{
//other properties are omitted here
_RimFalloff("RimFalloff", Float) = 1.0
}
float4 frag(v2f i) : SV_Target
{
float3 normal_world = normalize(i.normal_world);
float3 view_world = normalize(i.view_world);
float3 color = _Color.xyz * _Emiss;
float NdotV = saturate(dot(normal_world, view_world));
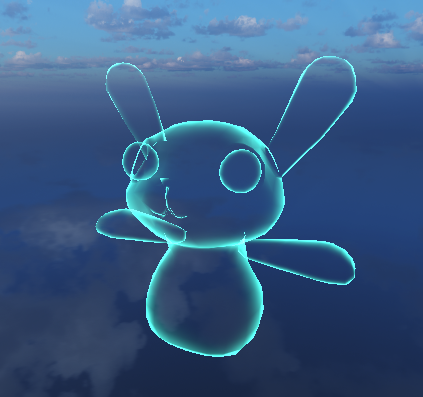
float fresnel = pow((1.0 - NdotV), _RimFalloff);
float rim = saturate(fresnel * _Emiss);
return float4(color, rim);
}Adjusting the RimFalloff, we will be able to push the rim light more to the boundary.
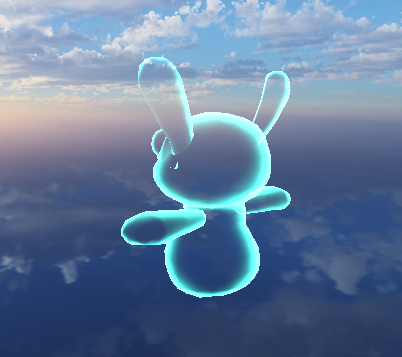
Fix the X-ray Effect
We can see the interior of the model using the above implementation, and sometimes this is totally undesired. We now need to fix the x-ray effect.
Step 1 Turn on the ZWrite. It does improves from certain viewing angles, but there's still some ghosted interior visibility.
Step 2 Add another Pass{} before the Pass{} we wrote before.
Pass
{
    Cull Off
    ZWrite On
    // We only write depth
    ColorMask 0
    CGPROGRAM
    float4 _MainColor;
    #pragma vertex vert
    #pragma fragment frag

    float4 vert(float4 vertexPos : POSITION) : SV_POSITION
    {
        return UnityObjectToClipPos(vertexPos);
    }

    float4 frag(void) : COLOR
    {
        return _MainColor;
    }

    ENDCG
}
Comments