Getting the Resources
Shader Canvas is a lightweight, open-source Shader editor I developed myself, which uses the Metal Shading Language. Since MSL is a shader language exclusive to Apple platforms, please understand that Shader Canvas cannot run on Windows and Linux systems.
Usually, if you want to learn about Shaders, platforms like Unity, Unreal, or Shader Toy are excellent choices. However, their features are so comprehensive that it's easy to get distracted by things outside the Shader itself—such as how to learn ShaderLab syntax, how to bind resources... Therefore, I created this small engine to let us start from simpler primitives as much as possible, and deal with as few things unrelated to parametric design itself as possible.
You are welcome to suggest modifications to Shader Canvas! Feel free to Fork a branch from GitHub at any time to create a Shader editor that better suits your workflow — but this is just my personal advice: I recommend keeping the features of this editor as streamlined as possible.
Rendering Pipeline
If you are a beginner in Shader development—so new that you haven't even heard of the concept of a rendering pipeline—I highly recommend systematically studying computer graphics (especially real-time rendering) first. This will help you effectively understand how the entire shader works.
If you are already familiar with Shaders, then we can start talking about the kind of mindset you need to build in your head when developing shaders.
Shader Stages, or Data Flow
No matter what graphics API we use, there are always certain stages that definitely exist in the rendering pipeline. We rarely interact directly with the GPU; often, the need to develop artistic Shaders comes from game engines or VFX engines.
Personally, I really like the term Data Flow. Think about it: whether making materials or post-processing effects, we always operate on a certain primitive. The raw data of these primitives (their vertex coordinates, normals, texture mapping, etc.) ultimately comes from the application. It is only when this data finally flows onto the screen that we see different visual effects.
In graphics classes, we are all required to memorize some shading model formulas, like , Blinn-Phong, or more advanced rendering equations. But regardless, taking the simplest Lambert Diffuse as an example, the data for doesn't just fall from the sky. is called the normal, which is an attribute of the primitive itself, and is called the light vector, which is the vector between the light's position in the scene and the object's position. So this is not just an attribute of the primitive itself, it's also an attribute of the scene. Furthermore, if and aren't even in the same coordinate space, then the dot product is completely meaningless.
Speaking of which, every interviewer will ask you what a dot product is. Please note that when answering this question, you must treat the interviewer as a 5-year-old child or an 80-year-old grandmother.
Assuming you are really unfamiliar with Shaders and the rendering pipeline, you always need to know that this data cannot appear out of thin air. If you need to use normals when calculating colors, then you must have something that gives you the normal information. Only then should you think about—where does this normal information come from?
A model (or application, or fbx/obj/usd file) can only ever give you information in its own local space, so this space is also called model space. If calculating lighting requires normals in world space, then we need a transformation — you should be familiar with the reasoning behind this transformation itself, but the coordinate system transformation of model data generally occurs in the Vertex Shader. Subsequently, because the objects we are shading are pixels, and not every pixel has a vertex on it, we need a Rasterizer to amplify the data volume from to , where is obviously the width and height of the screen. After that, every pixel has a "fictional" vertex, and then we use the Pixel Shader or Fragment Shader to render the color.
Data Flow in Shader Canvas
On the left side of Shader Canvas, I provided a panel named Data Flow.
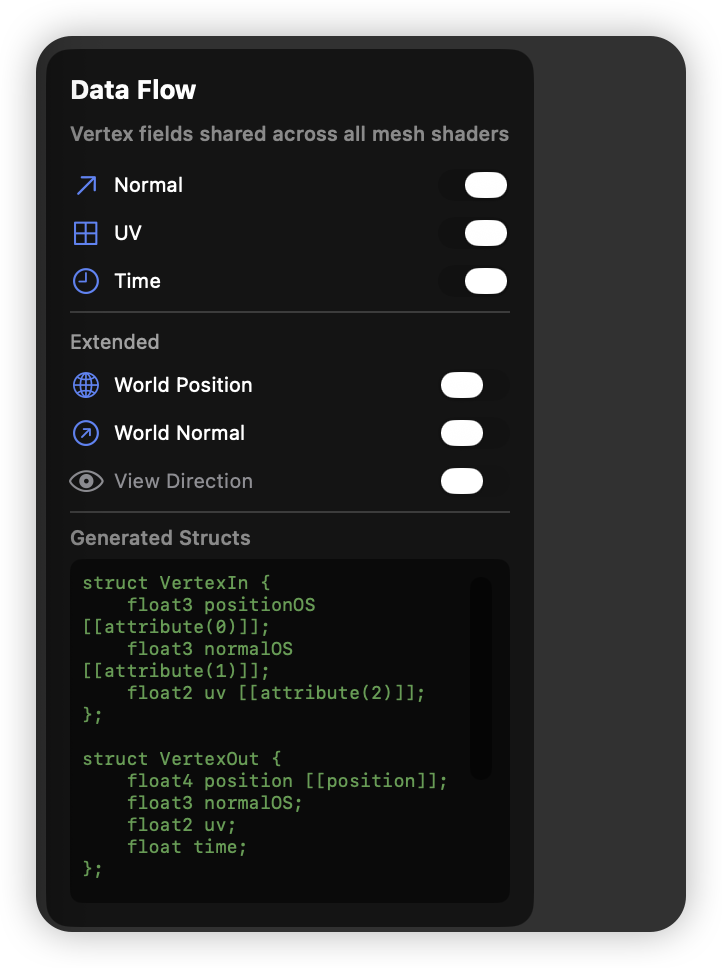 This panel helps you decide what data you want to use in your Shader. However, this is the most basic version of Shader Canvas; in reality, you can completely extend it to support more data like tangents and bitangents. But to focus as much as possible on the possibilities brought by simpler effects, I decided to only pass normals, uv, position, time, and view vectors in my data flow.
Simple Effects
I think generally the simplest effect is probably the Rim Light.
 Rim Light itself doesn't require any vertex transformation; you just need to understand how to "get" the edge through .
In Shader Canvas, even if you don't add any Shader to a Layer, it will still have a basic Lambert Shading, and pixels will be normally mapped to screen space, so you don't need to worry. If you don't need to change the vertex positions, you can completely skip adding any Vertex Shader.
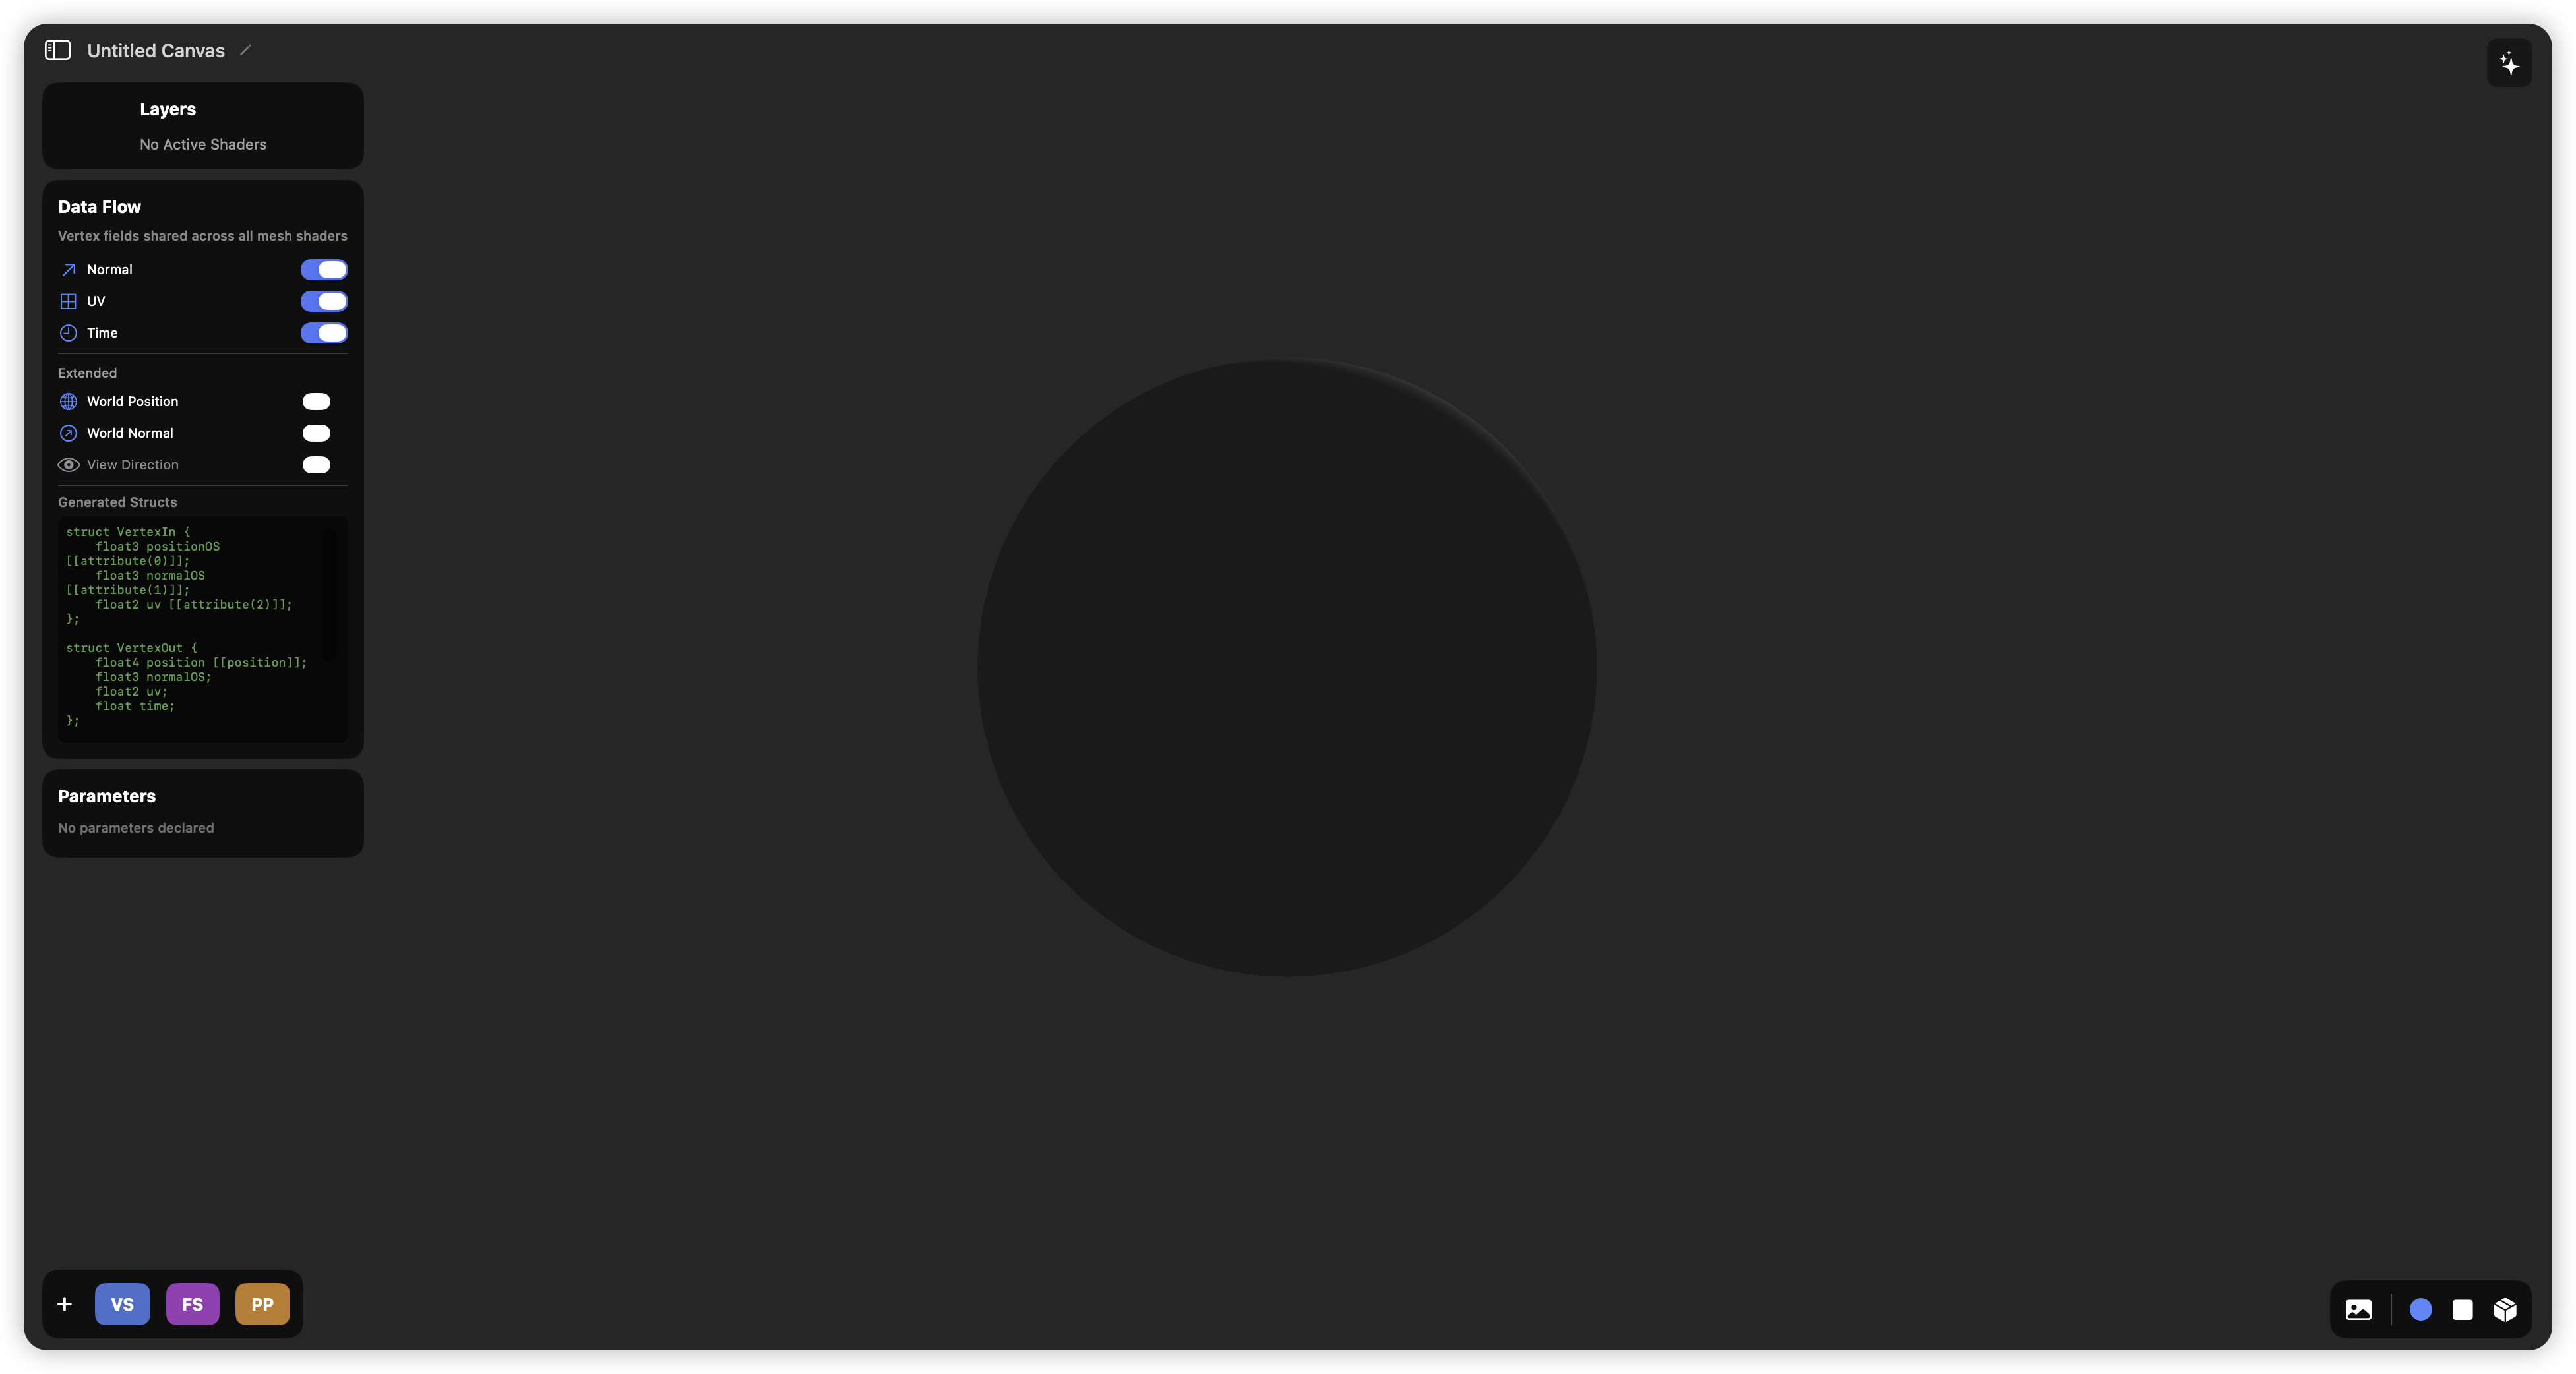
Now let's add a basic Fragment Shader. Click and clear the default provided Fragment Shader.
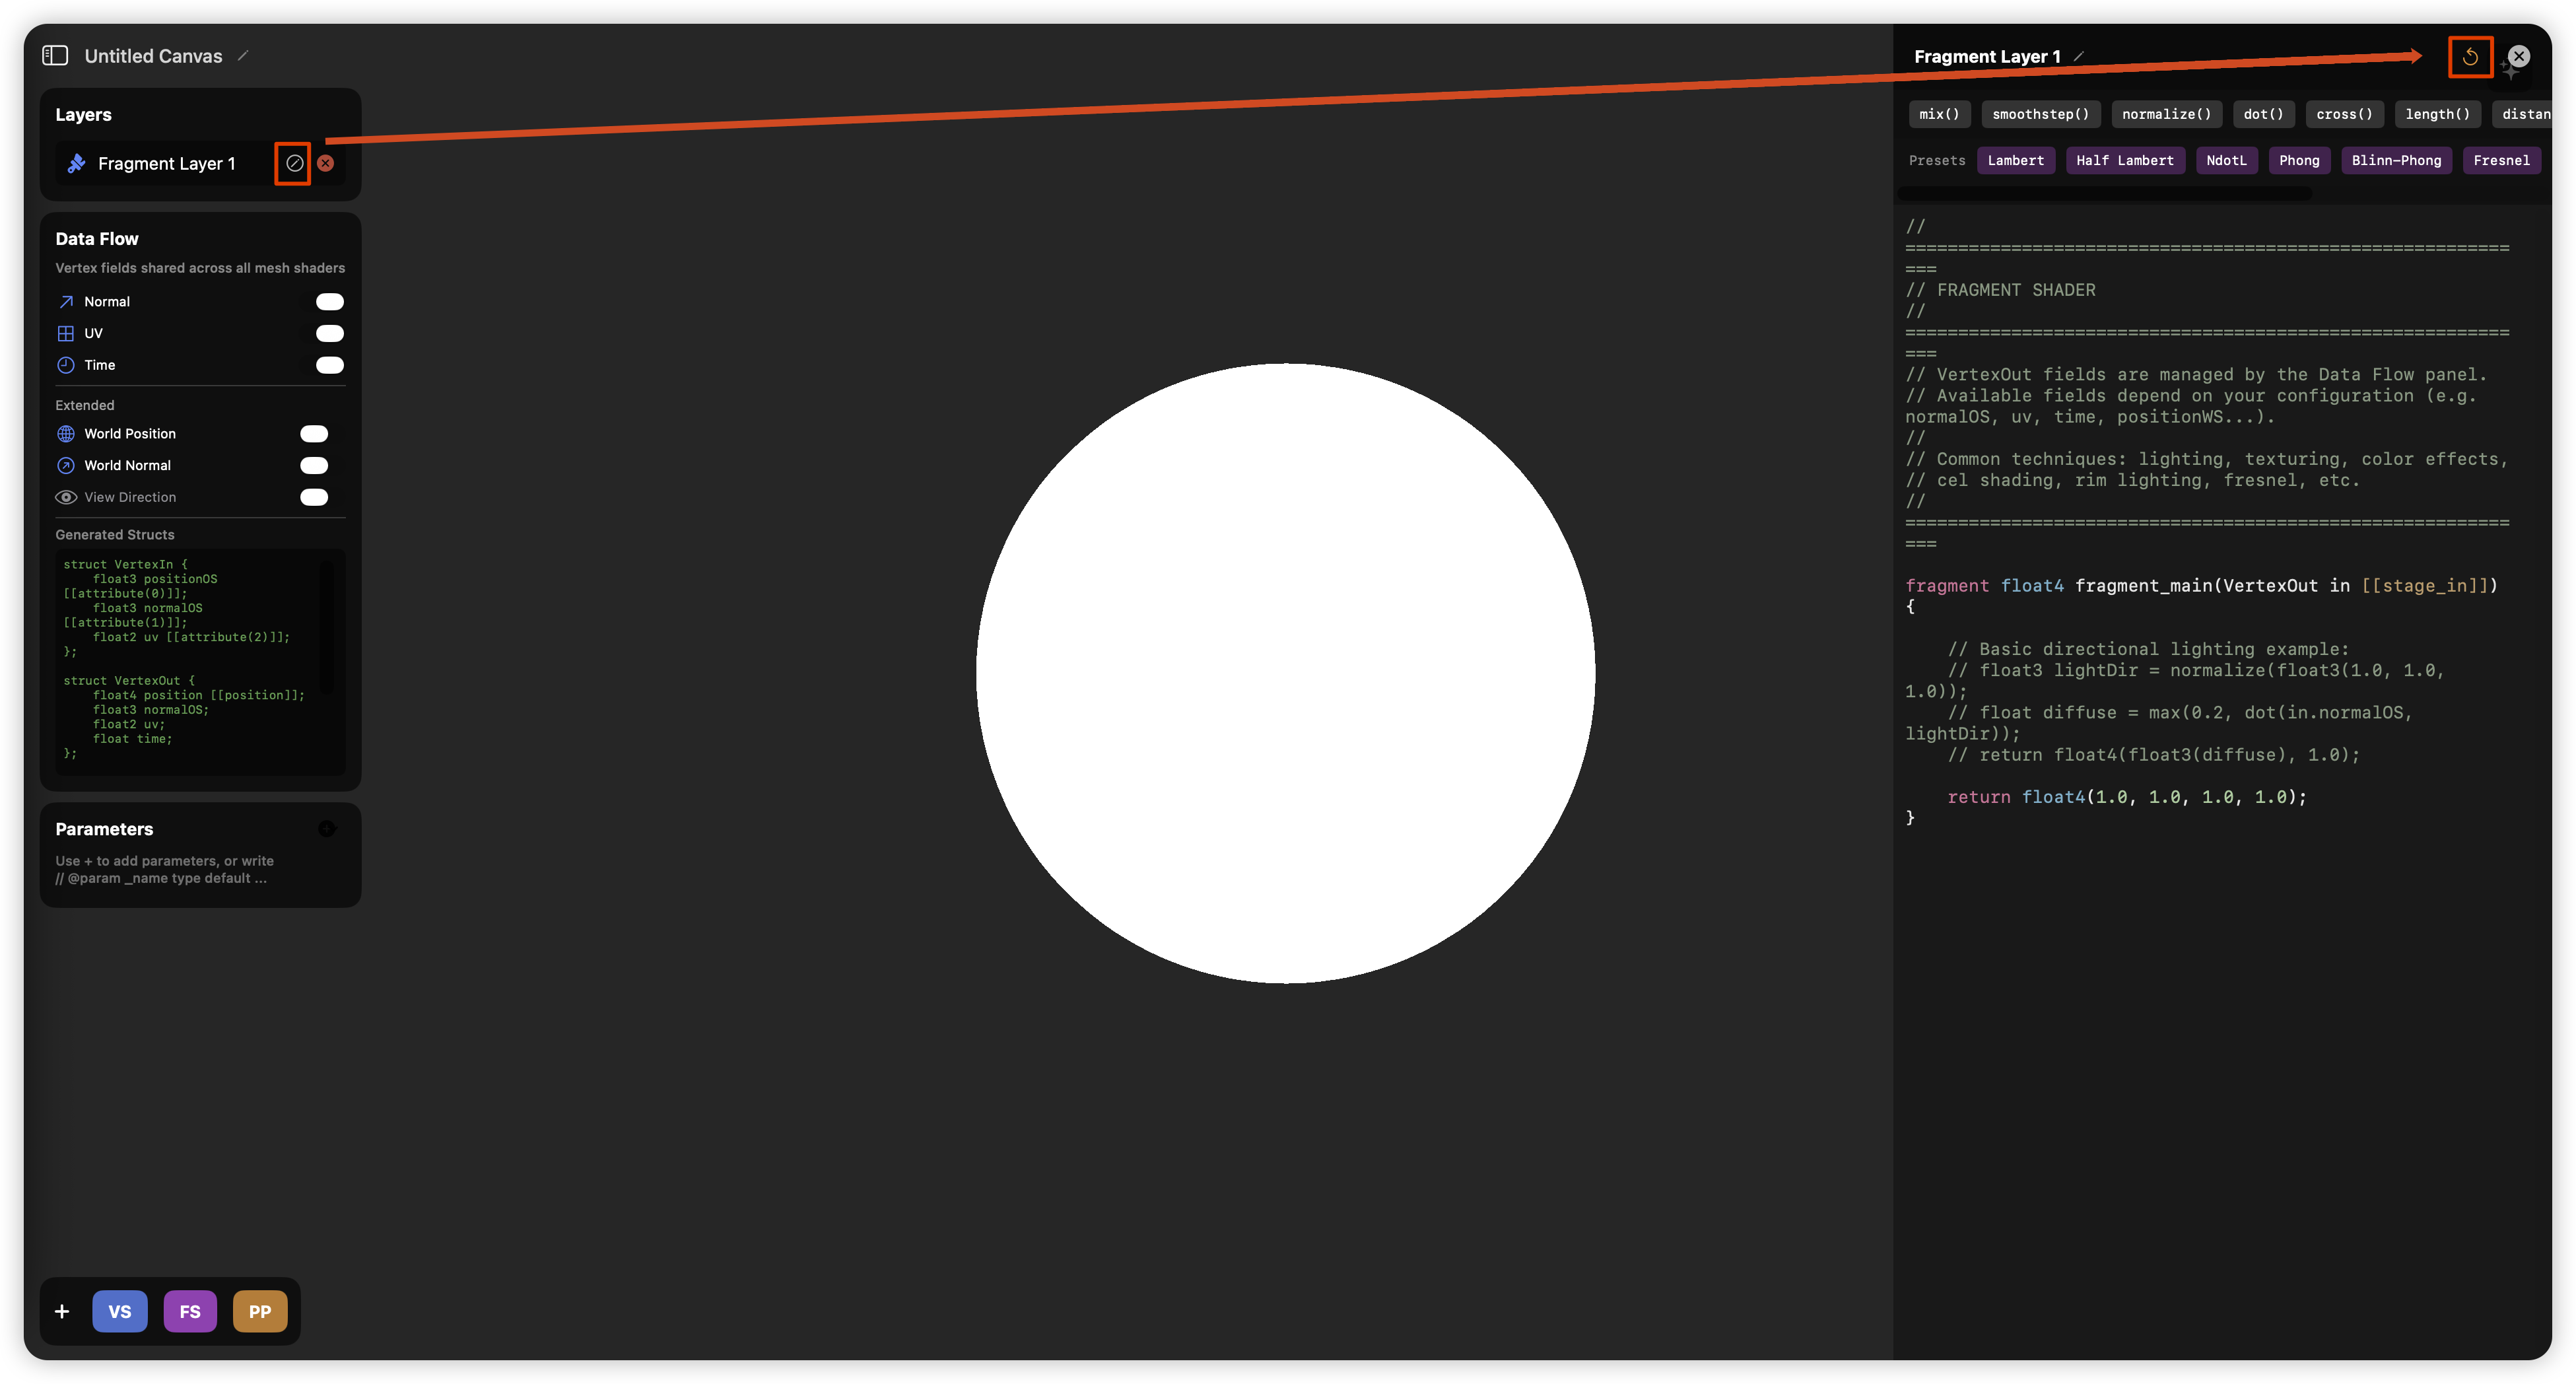
If you are not familiar with MSL, this is a good time to look at this template—and you can also see that you only need to write the fragment shader on the side! There's no need to supplement any other code.
MSLfragment float4 fragment_main(VertexOut in [[stage_in]]) {
    return float4(1.0, 1.0, 1.0, 1.0);
}
Here, fragment is the keyword that marks this function as the entry point for the fragment shader. [[stage_in]] indicates that in is an interpolated input. As a special note, the return type doesn't actually need to be float4, and Apple seems to recommend using half4 to represent colors. You just need to slightly distinguish between half and float, and keep in mind that MSL very likely does not support implicit type casting in various places.
Mathematical Principles
Mathematically, Rim Light is essentially the Fresnel effect, and the mathematical formula for the Fresnel effect is
Where:
- : Usually calculated using (the dot product of the normal vector and the view vector).
- : The reflectance of the material at normal incidence (i.e., the viewing angle is perpendicular to the surface, ).
- : In the standard Schlick model, this power is usually fixed at 5, but sometimes for artistic effects, people will change it to a variable to control the range of the rim light.
A more readable Schlick approximation formula is,
Where, in a way that is easier for artists to understand, is a brightness coefficient, and is a transparency threshold.
Implementation
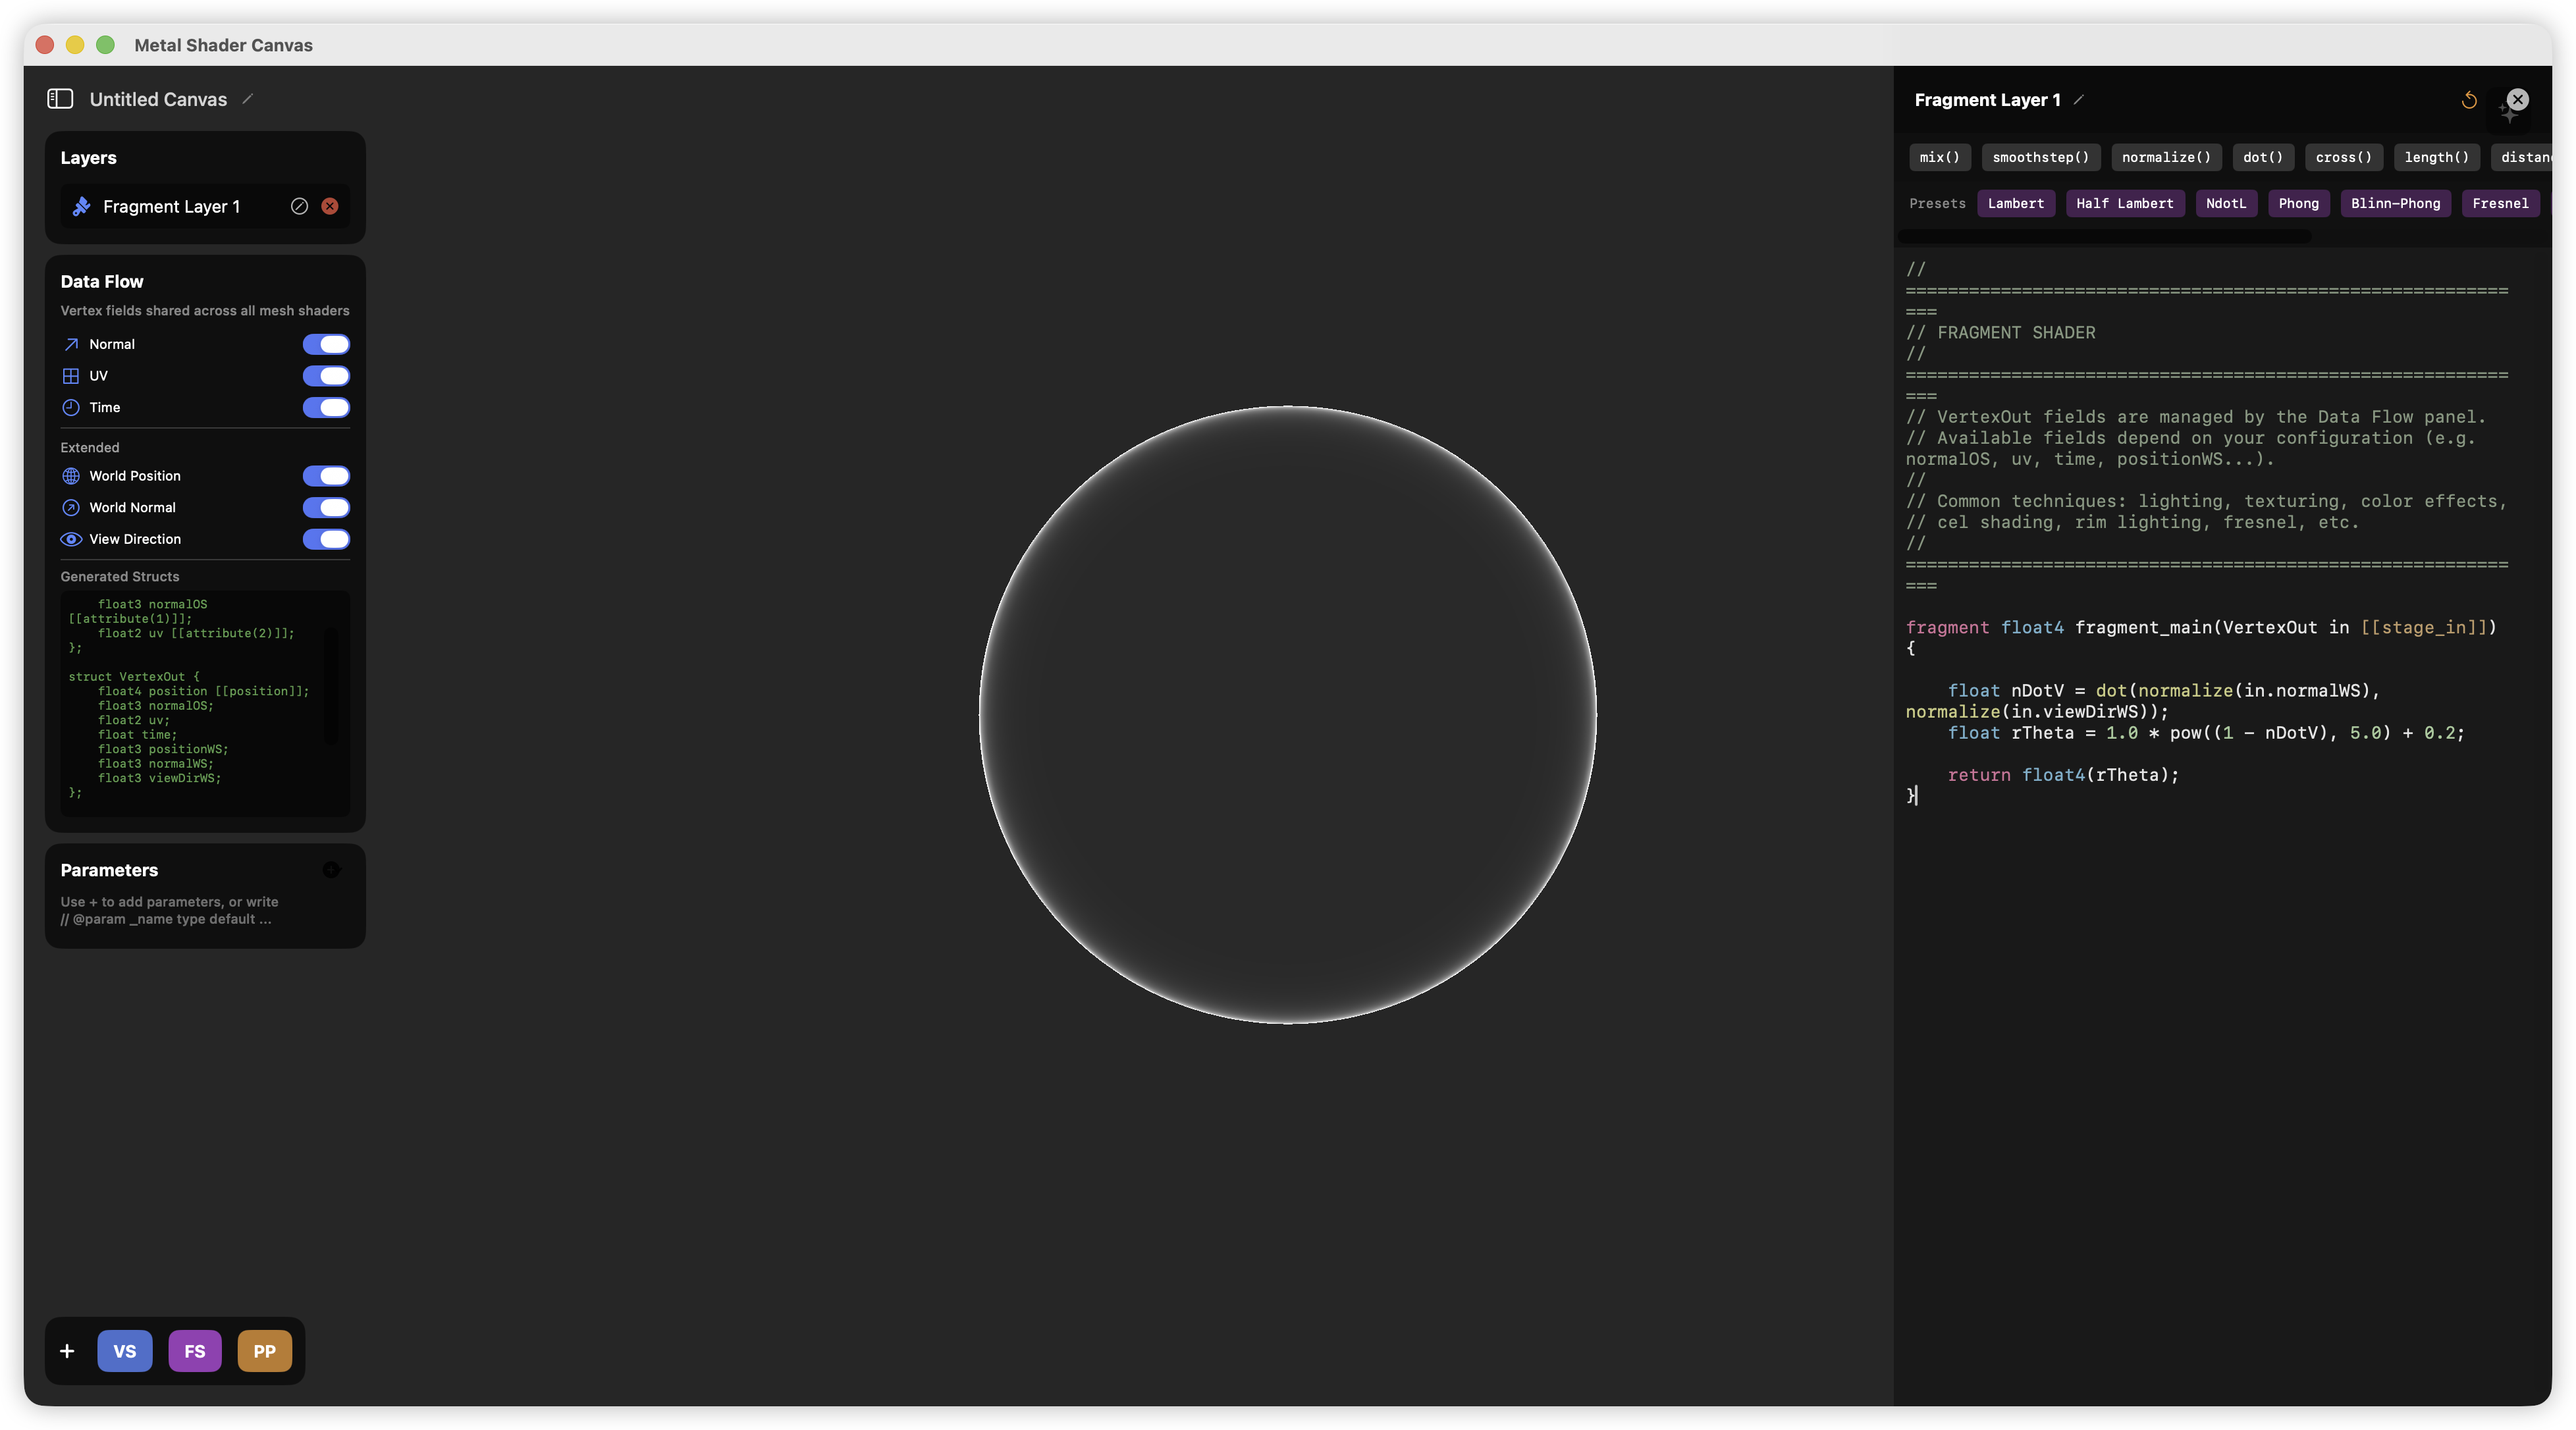
Just by writing out the formula, the code is already very clear.
MSLfragment float4 fragment_main(VertexOut in [[stage_in]]) {

    float nDotV = dot(normalize(in.normalWS), normalize(in.viewDirWS));
    float rTheta = 1.0 * pow((1 - nDotV), 5.0) + 0.2;

    return float4(rTheta);
}
Indeed, you can see a pretty good effect:
Is that enough? Not quite. For a Technical Artist, parameter flexibility is crucial, and we certainly don't want to hardcode magic numbers like 1.0 and 0.2 into the code. Shader Canvas provides a very convenient way to set parameters. You can add new parameters in the Parameters panel on the left, such as adding a slider named Bias,
 This will automatically add a line of comment above your fragment shader,
MSL//@param _Bias float 0.5 0.0 1.0
This syntax helps you define the data type, current value, minimum value, and maximum value. You can also add other parameters yourself to see the effect. For example, I added these parameters:
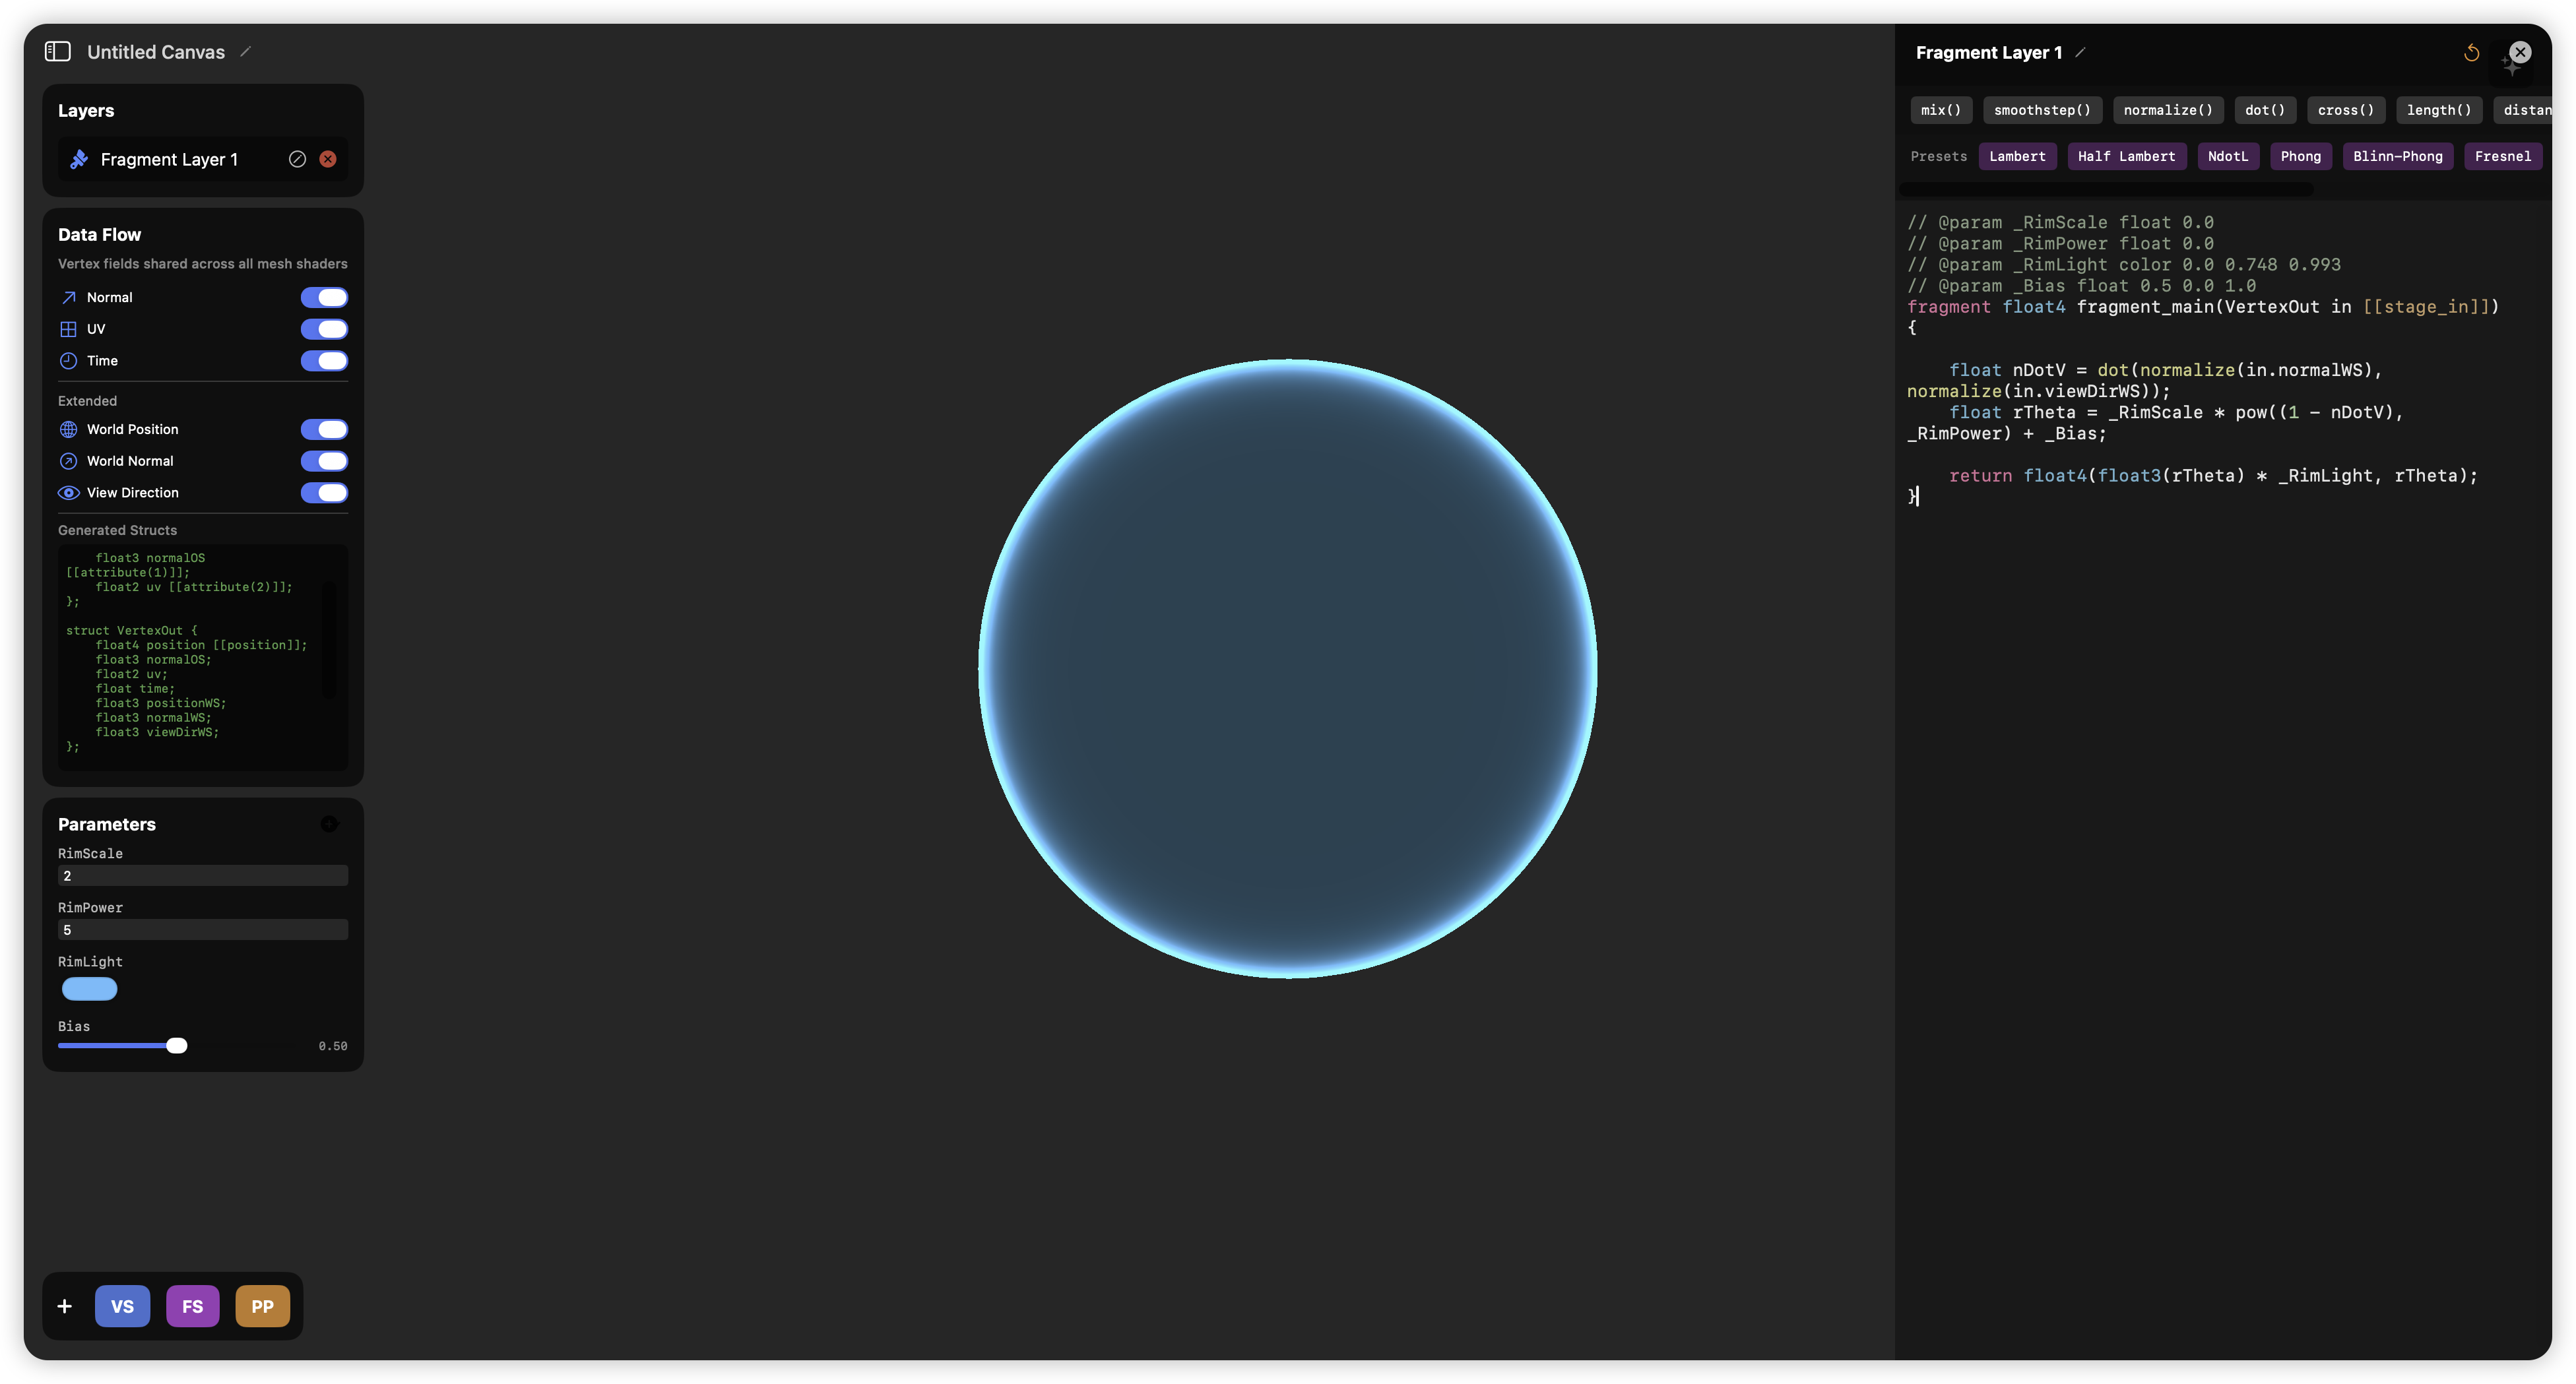
MSL// @param _RimScale float 0.0
// @param _RimPower float 0.0
// @param _RimLight color 0.0 0.748 0.993
// @param _Bias float 0.5 0.0 1.0
fragment float4 fragment_main(VertexOut in [[stage_in]]) {

    float nDotV = dot(normalize(in.normalWS), normalize(in.viewDirWS));
    float rTheta = _RimScale * pow((1 - nDotV), _RimPower) + _Bias;

    return float4(float3(rTheta) * _RimLight, rTheta);
}
On a technical level, we might also need to consider the numerical range. For example, is it possible for to be negative? It is entirely possible, so we should also clamp it.
MSLfloat nDotV = saturate(dot(normalize(in.normalWS), normalize(in.viewDirWS)));
Let's Add Some Simple Post-Processing First
Just to let you know that Shader Canvas can provide some basic post-processing effects — of course, post-processing should also be your task! You should be responsible for the pre-production, mid-production, and post-production of the entire visual effect. We will deal with some fullscreen-related content in other Blogs in the future.
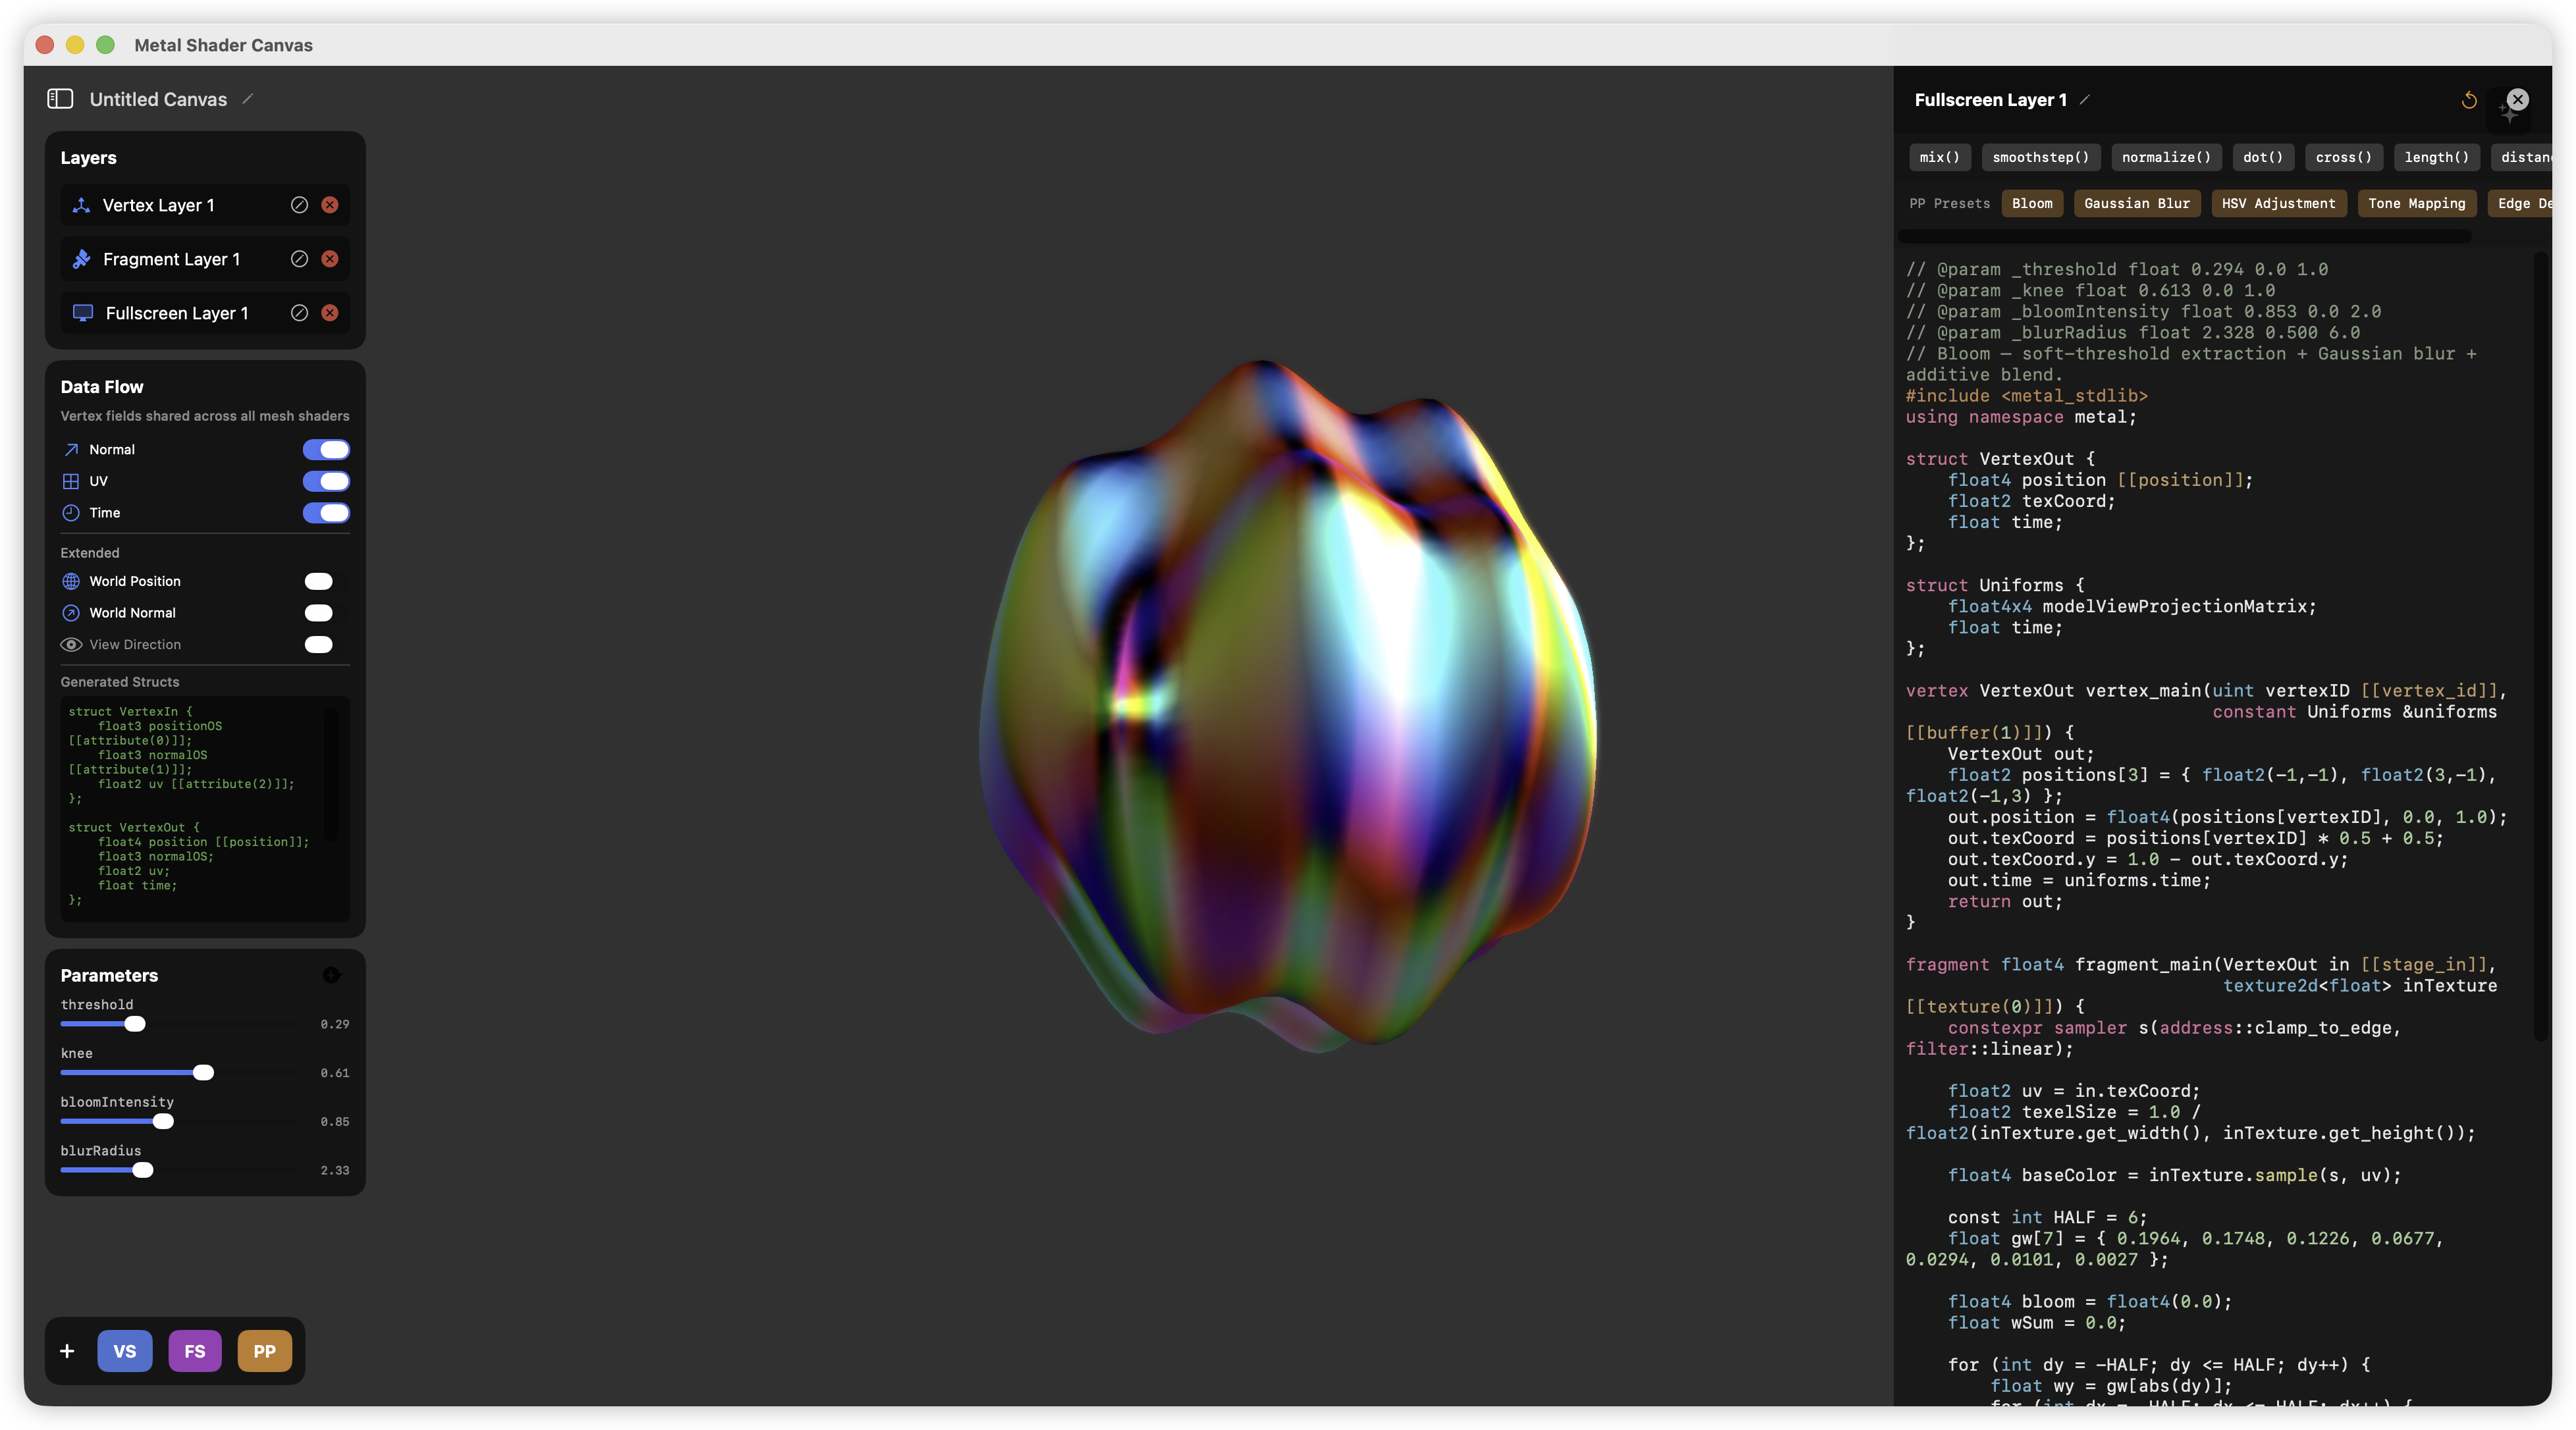
For now, you just need to click the PP button to add a Fullscreen Layer.
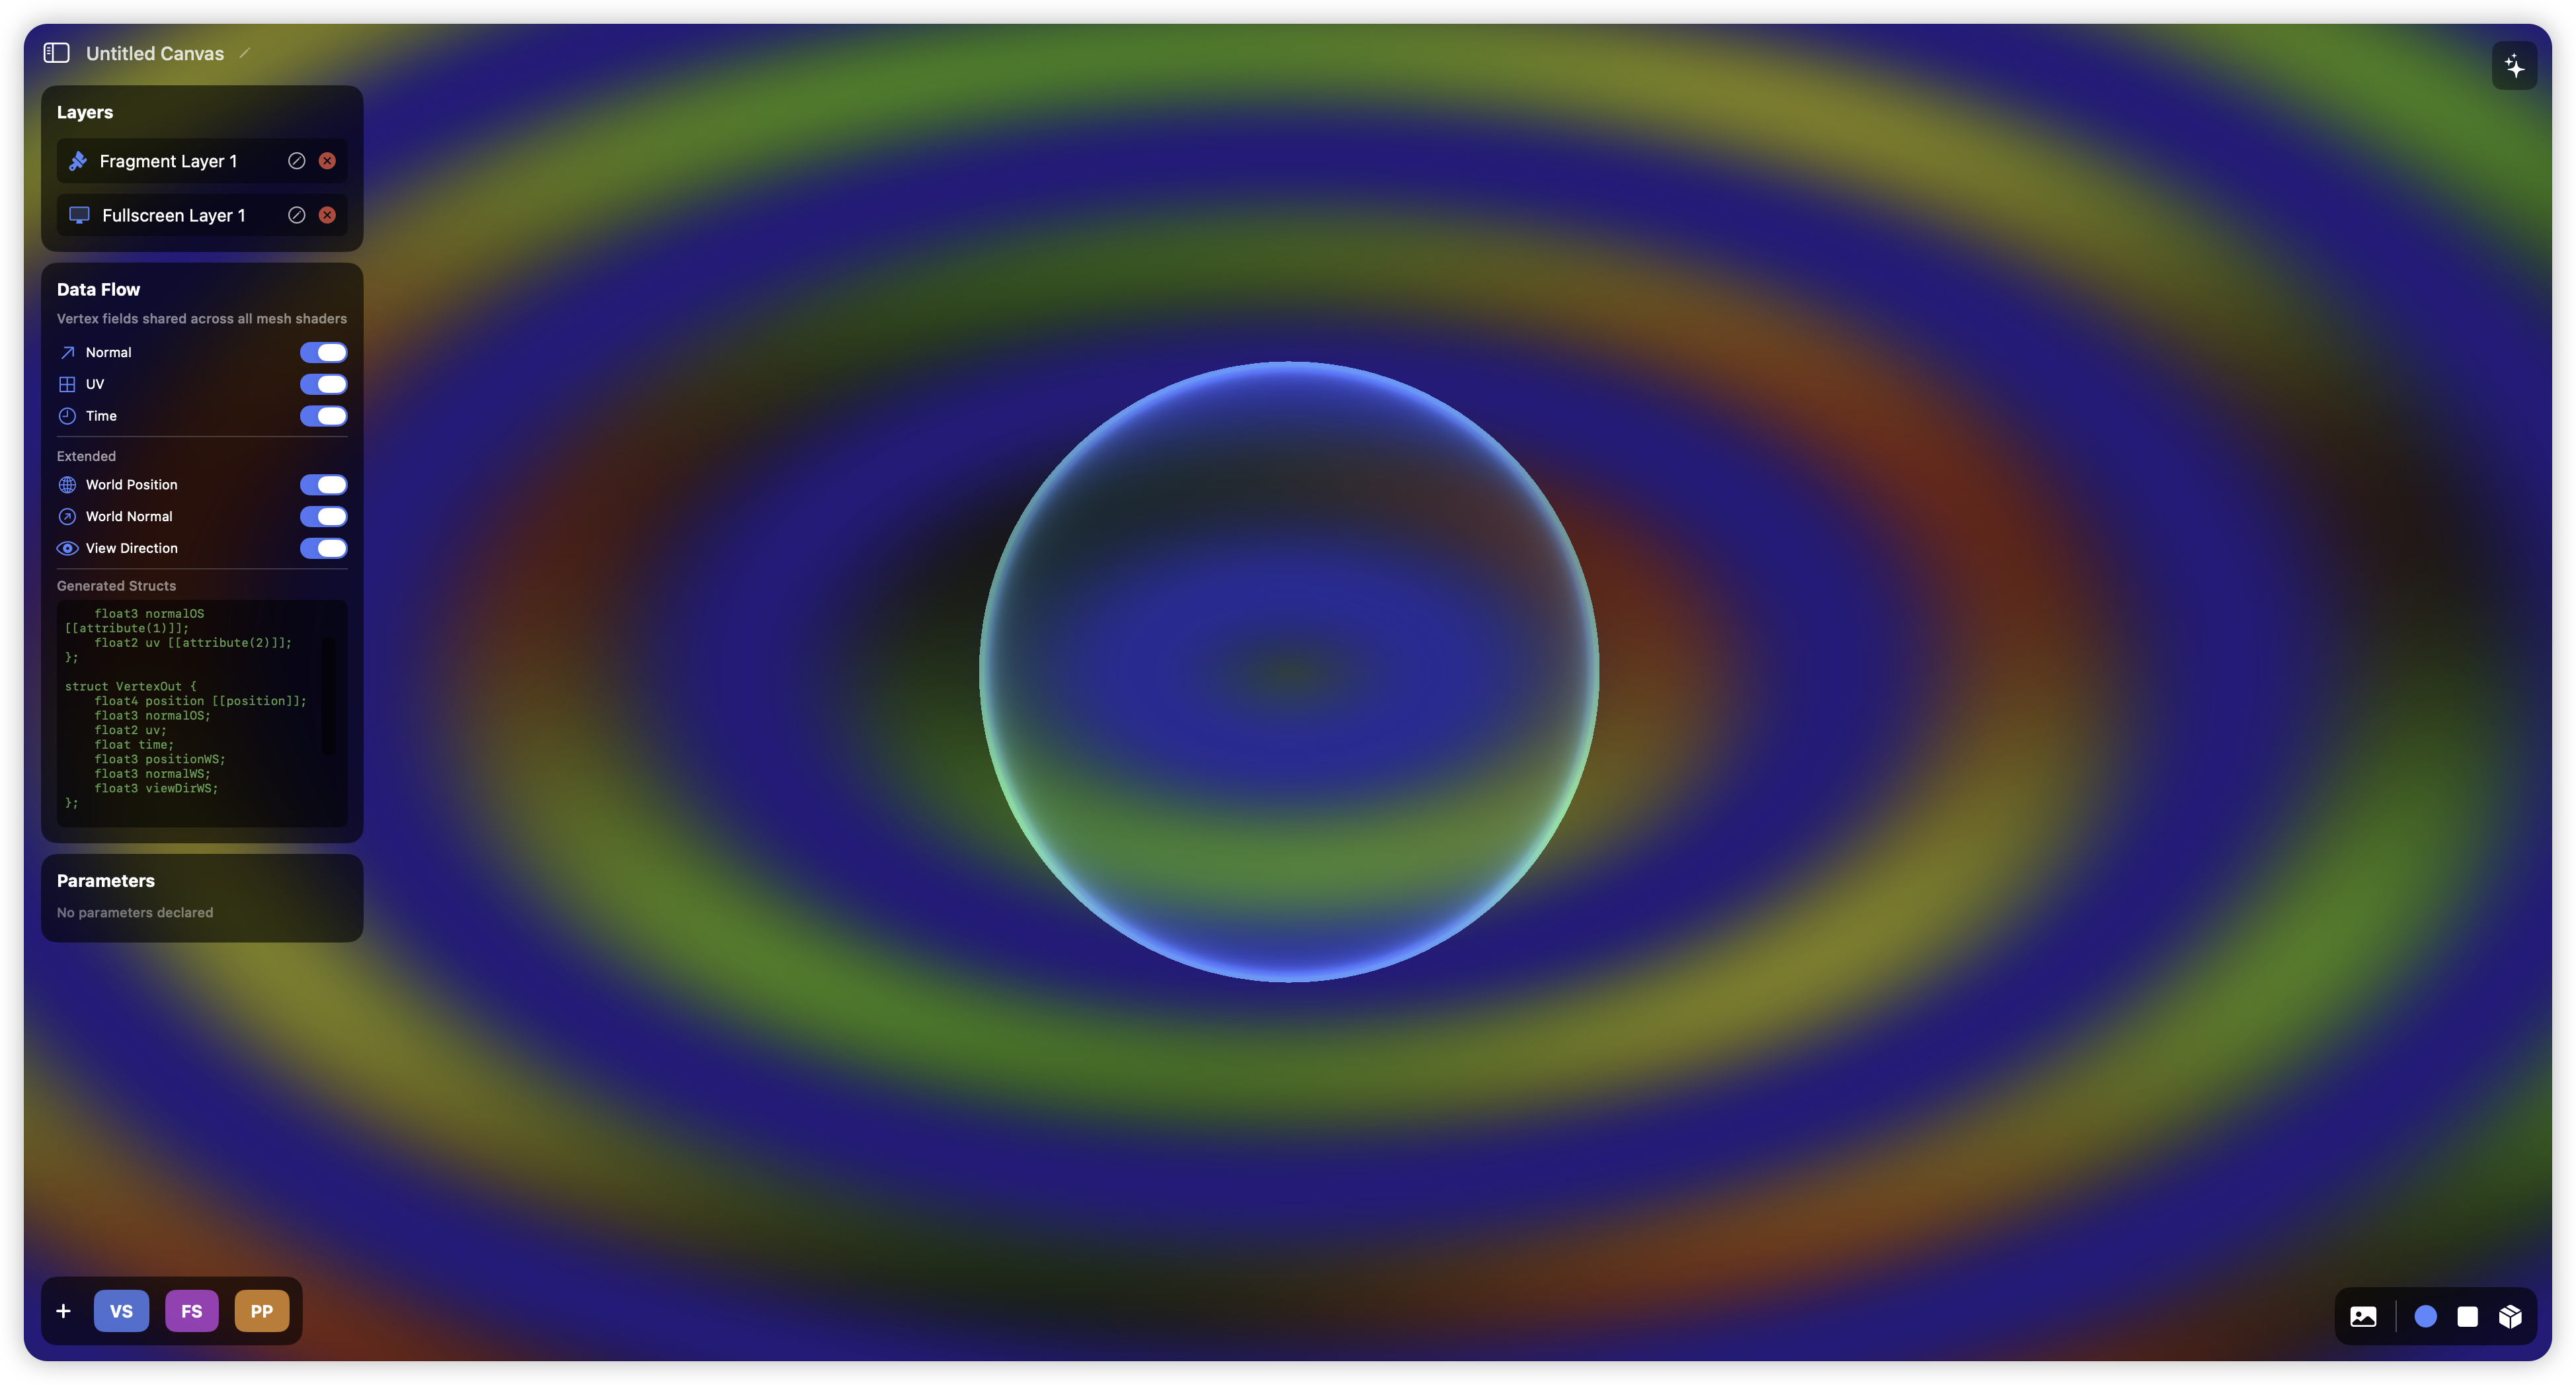 This effect is pretty cool, isn't it? Open Fullscreen Layer 1 (or you can rename it to Bloom). Follow the settings below to use a default Bloom effect.
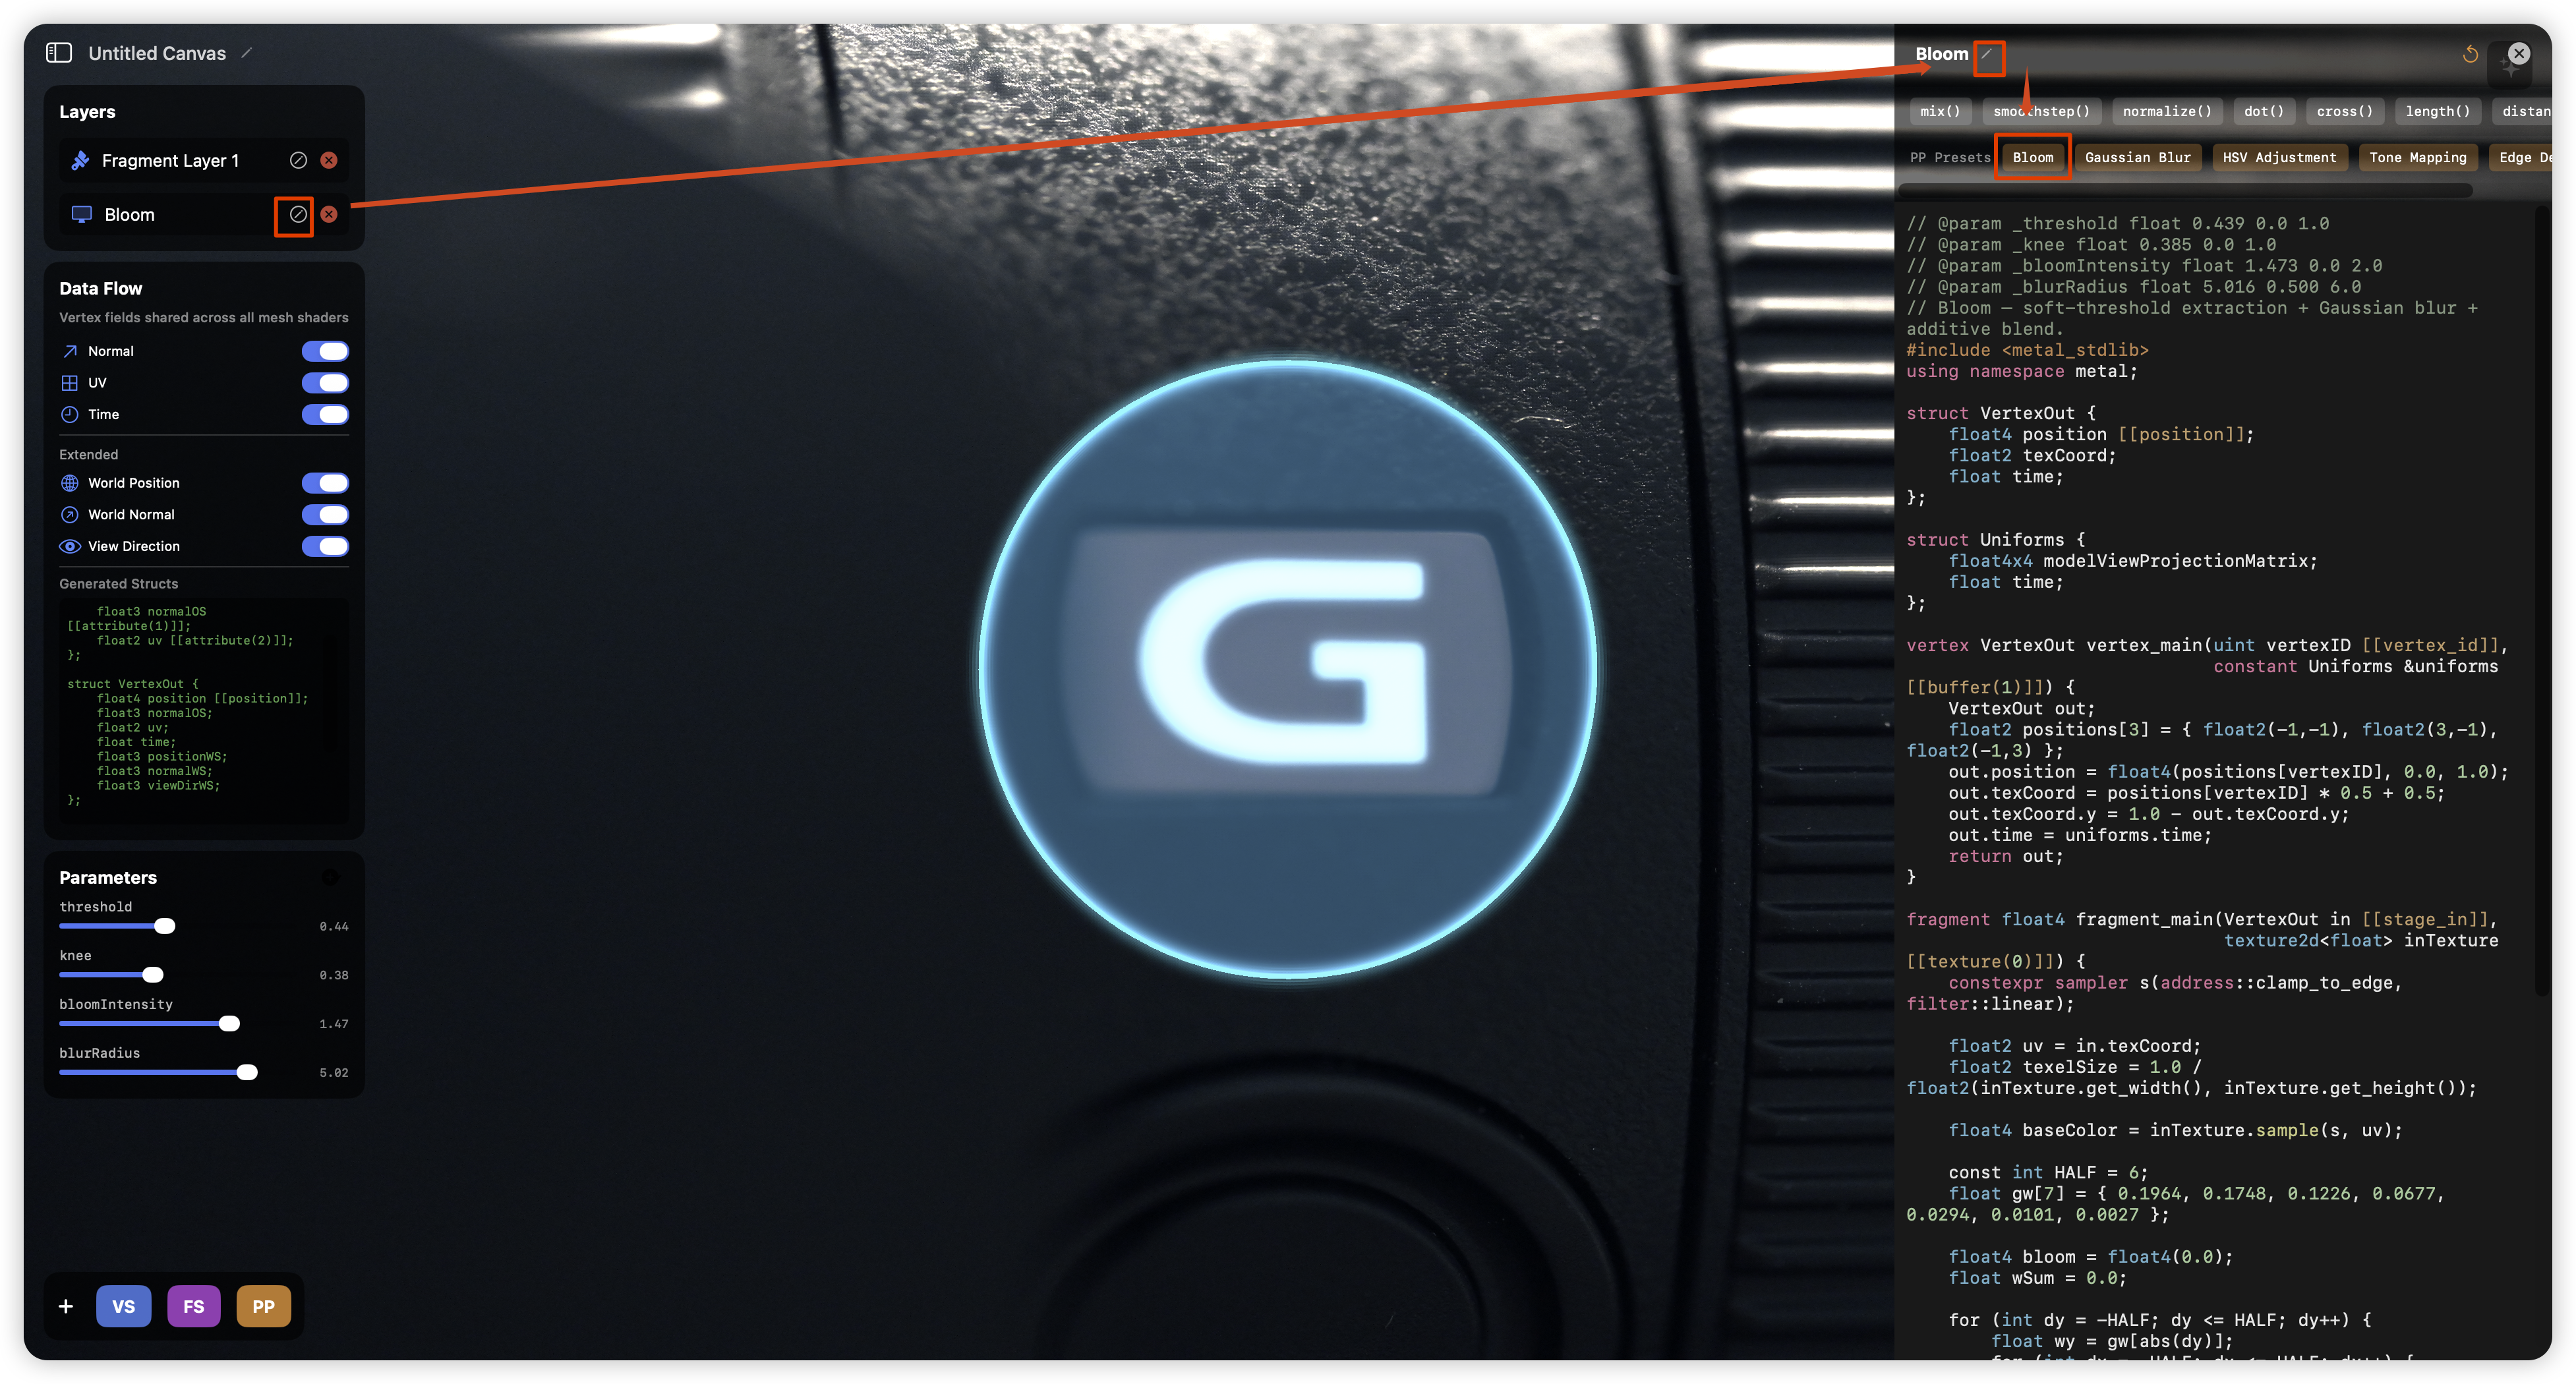
Oh, the background image can be set in the bottom right corner of Shader Canvas!
What? You think this Bloom's performance is terrible, and the quality and effect are too poor? No problem, I believe you can definitely write something better using Shader Canvas!
Digression
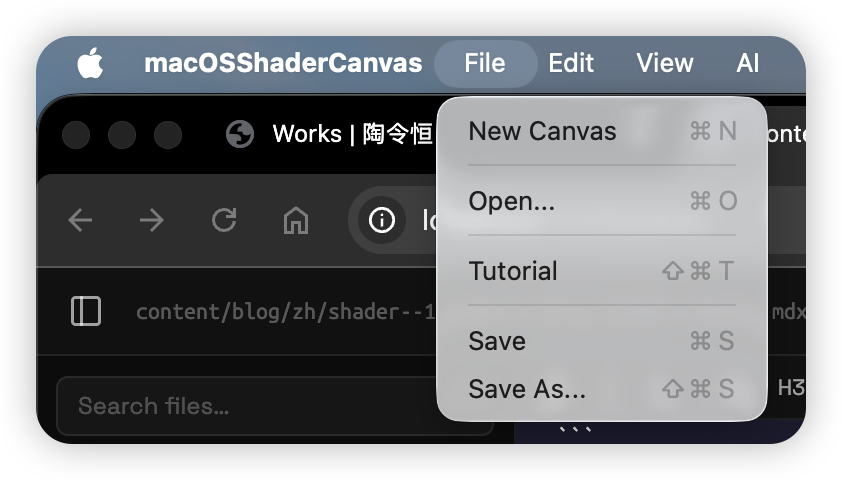
If you are very unfamiliar with Shaders, especially MSL, you can try the Tutorial feature of Shader Canvas. This feature should help you get started with MSL quickly. Go give it a try.